
Get Your Home Ready for Winter With These Four Essential Tasks
Summary
Reading Time
5 min
Before winter arrives, there are several things you need to do inside and out to make sure your home can handle the frigid temperatures ahead. Canadian Prairie weather can hit hard, especially in the winter. Being proactive is the best way to ensure you have a safe, comfortable, and efficient winter season. We’ve put together four easy tasks you should complete before the snow starts to fall to get your house, condo, or rental property winter-ready.
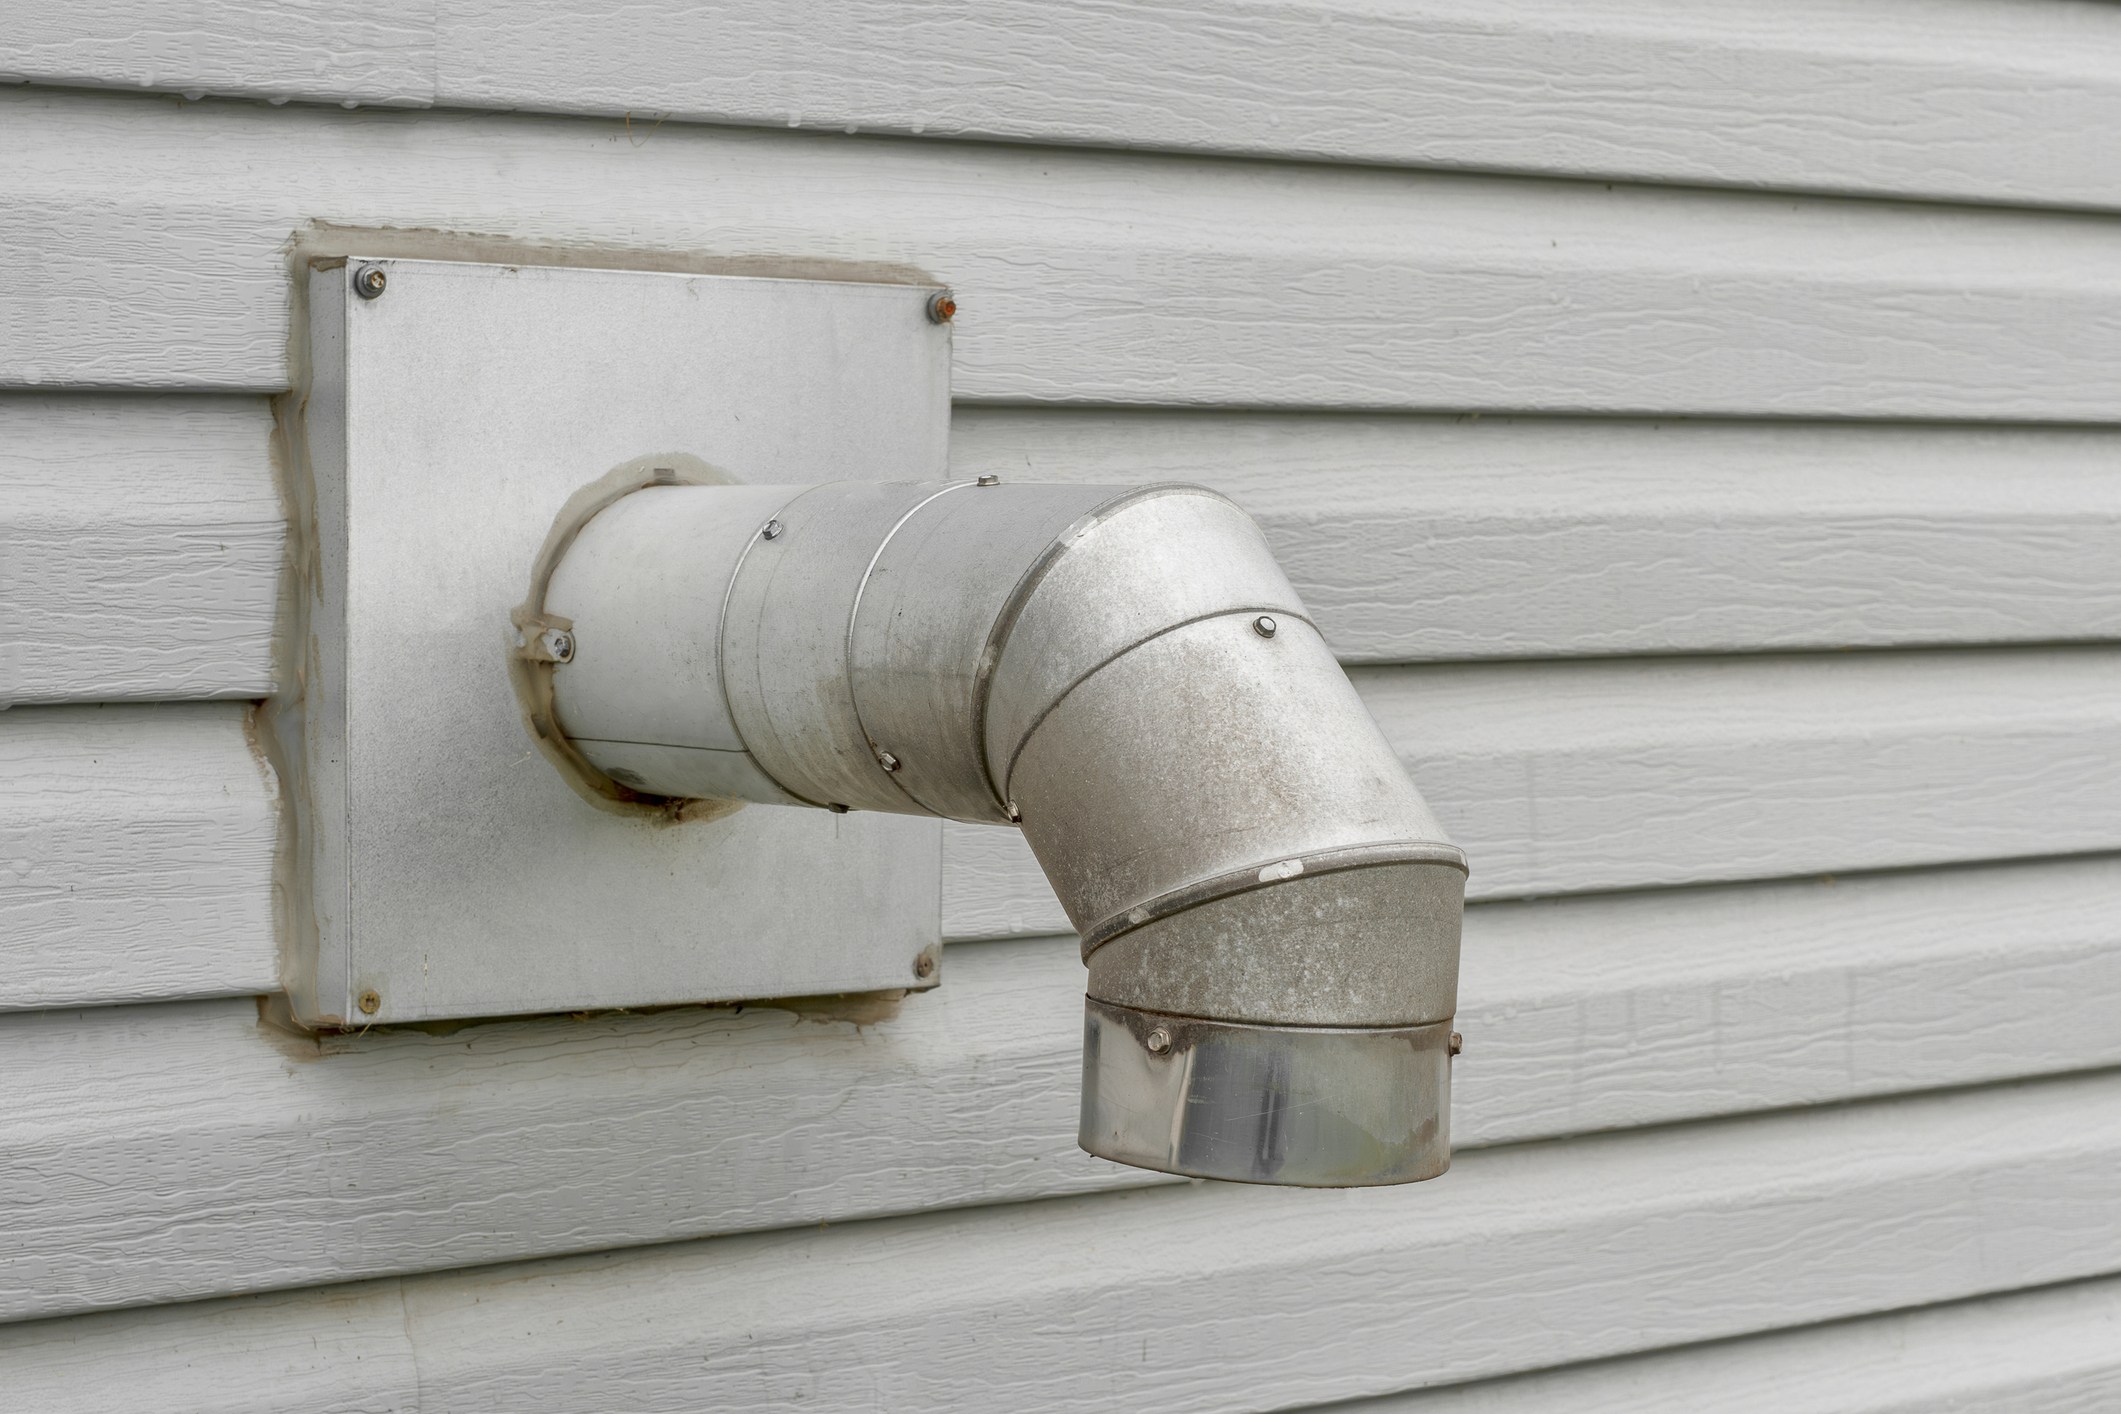
Exterior vents
Before winter, make sure to check all your exterior vent openings, like your dryer vents. If the screen is damaged or missing, it should be replaced to help prevent rodents and other pests from infiltrating your home. When it starts getting cold outside, they start looking for a warm place to stay, and mice aren’t so cute when they’re inside your home!
Eavestroughs
In the fall, all debris should be cleaned out of your eaves. Over the summer and fall, leaves and branches accumulate and can obstruct water flow. When spring comes and the snow starts to melt on the roof, there needs a clear channel for the water to move down and away from your foundation.
Here's a step-by-step guide on how to clean them effectively:
- Safety First: Ensure your ladder is stable and placed on a flat surface. It's a good idea to have someone hold the ladder for extra stability. Always follow ladder safety guidelines.
- Remove Large Debris: Put on your gloves and climb the ladder. Start by removing large debris like leaves, twigs, and dirt using a garden trowel or a gutter scoop. Place the debris in a bucket or garbage bag.
- Flush the Gutters: Once the large debris is removed, use a hose with a spray nozzle to flush out the remaining smaller particles. Start at the end farthest from the downspout and work your way towards it. This helps ensure that the water flows smoothly towards the downspout.
- Check and Clear the Downspouts: Ensure that the downspouts are not clogged. You can use the hose to flush out any blockages. If the water doesn’t flow freely, you may need to use a plumber’s snake or a long stick to clear the obstruction.
- Inspect for Damage: While you're up there, take the time to inspect your eavestroughs for any signs of damage, such as rust, holes, or sagging sections. Repair or replace damaged sections as needed.
- Install Gutter Guards (Optional): To make future cleanings easier, consider installing gutter guards. These are mesh or screen covers that prevent debris from entering the gutters while allowing water to flow through.
If this sounds like something you’re not sure you want to tackle on your own, you can always hire an eavestrough and gutter cleaning professional to do the job!
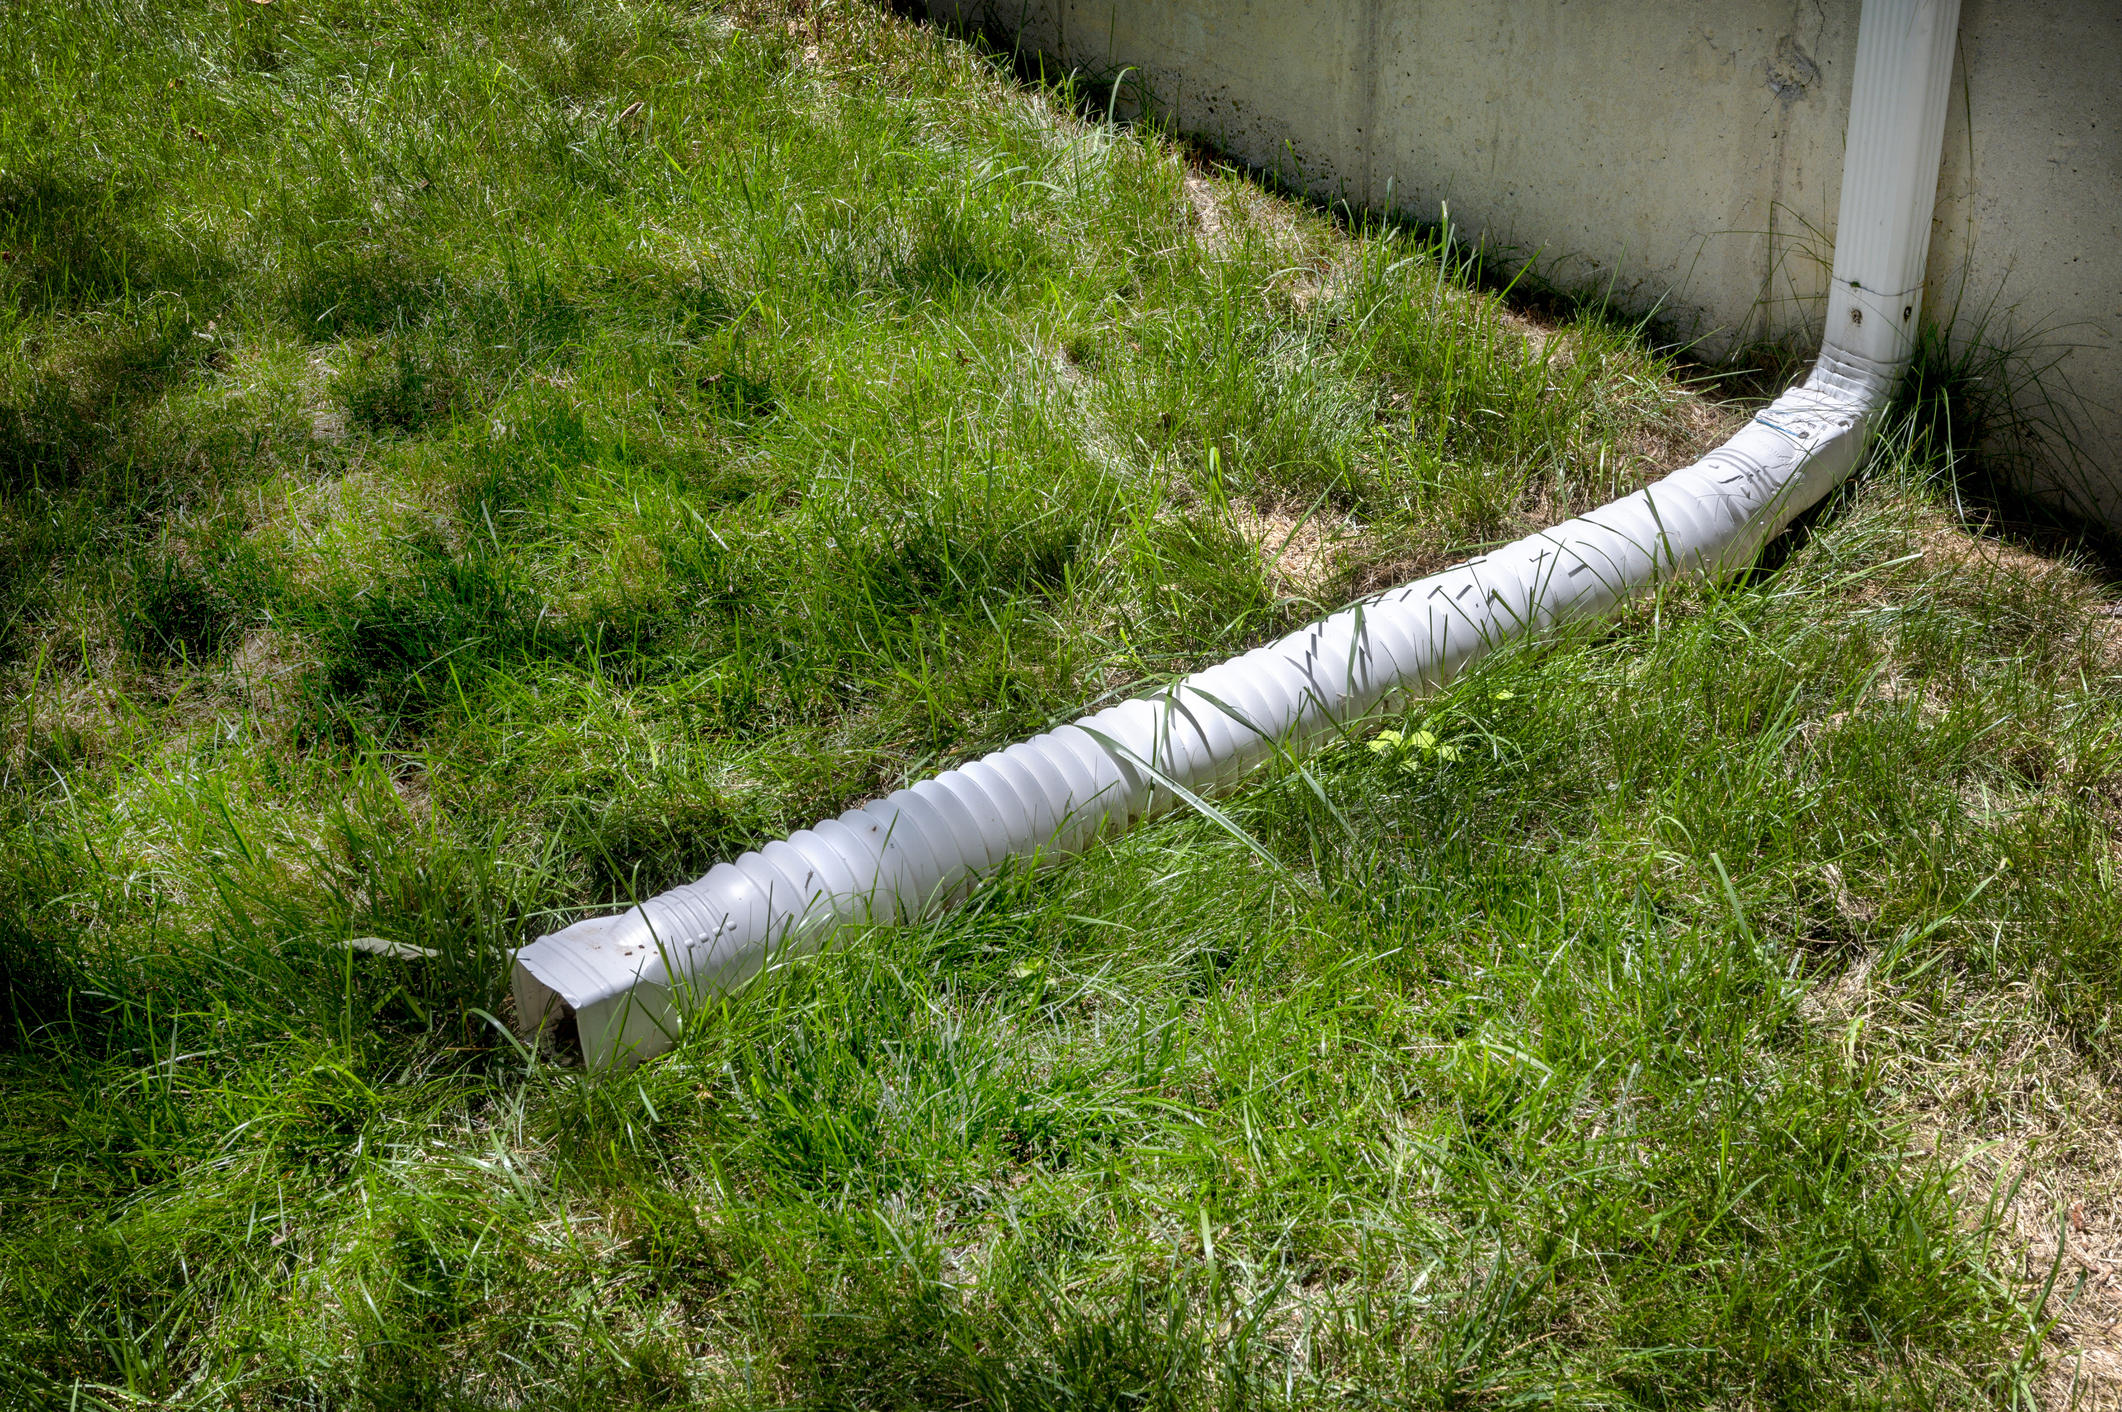
Downspout Extensions
It’s always a good idea to remove or lift up your downspout extensions before winter to protect them from damage caused by heavy ice and snow. But, if you don’t want to deal with a flooded basement in the spring, you must remember to reinstall or bring them back down as the weather warms up. This is because their purpose is to work with your eaves and downspouts to carry water away from your foundation when it rains or the snow starts to melt.
Furnace Filters
Checking your furnace filters and replacing them as needed is the best way to take care of your furnace, especially in the fall. During the winter, your furnace is running often and working harder. Having clean air circulating through your home is important for your health and important in keeping your furnace running smoothly.
Replacing a typical furnace filter is a straightforward task that can help maintain your HVAC system's efficiency and improve your home's air quality. Here’s a step-by-step guide to help you through the process:
- Turn Off the Furnace:
- For safety, turn off the furnace before you start. You can do this by switching off the furnace at the thermostat or turning off the power to the furnace via the circuit breaker.
- Locate the Filter Compartment:
- Find the filter compartment. It is usually located near the air intake or blower compartment of the furnace. You might need to remove a panel or door to access it.
- Remove the Old Filter:
- Slide out the old filter. Take note of the direction of the airflow arrows printed on the filter frame. These arrows indicate how the filter should be oriented when you install the new one.
- Check the Old Filter:
- Inspect the old filter. If it's covered in dust and debris, it's definitely time for a replacement. If it looks relatively clean and you’re unsure, consider checking the manufacturer’s recommendation for filter replacement intervals.
- Insert the New Filter:
- Slide the new filter into the compartment, ensuring the airflow arrows are pointing in the correct direction. Typically, the arrows should point towards the furnace or blower.
- Secure the Compartment:
- Replace any panel or door you removed to access the filter compartment, making sure it’s securely closed.
- Turn the Furnace Back On:
- Restore power to the furnace by turning it back on at the thermostat or circuit breaker.
- Label the Date (Optional):
- It can be helpful to write the date of replacement on the filter frame with a marker. This way, you’ll know exactly when it was last changed.
Seasonal Properties
If you have a cabin or cottage, it’s important to perform all the tasks above before wintertime, but if your property is going to be vacant over the season, there are additional steps you should take. We break it down in our blog Winter-Ready and Insured: Protecting Your Cabin Haven Inside and Out.
Preparing your home for the winter doesn’t have to be a daunting task. By focusing on these four areas—exterior vents, eavestroughs, downspout extensions, and furnace filters—you’re setting yourself up for a trouble-free winter. So, take a weekend to knock out these chores, and you’ll thank yourself when the temperatures drop.
Please note that the information in this article may not accurately reflect your insurance policy from Sandbox Mutual Insurance or another insurance company. Please refer to your policy or talk to your broker about your specific coverages.

FAQ'S
Does my home insurance cover damage from frozen pipes or winter storms?
Often yes—but only if you’ve taken reasonable steps to prevent the damage. That means insulating pipes, keeping your home heated, and making sure drainage systems are working correctly. Home insurance can help with the aftermath, but proactive winter maintenance is what keeps minor issues from becoming costly claims.
Do I really need to clean my eavestroughs every fall?
Absolutely! Clogged eaves can cause water to pool, freeze, and eventually back up into your roof or foundation. A quick clean-out before winter helps meltwater flow safely away from your home—saving you from potential leaks, ice dams, and springtime basement surprises.
Why is replacing my furnace filter so important before winter?
A clean filter helps your furnace run efficiently, reduces energy costs, and keeps the warm air in your home cleaner throughout the season. If your furnace is working harder because of a dirty filter, it can wear out faster—and no one wants a furnace breakdown in -30°C.